The Visual Facebook Ads Guide for Beginners
Facebook advertising uses easy-to-follow visuals, real examples, and a step-by-step structure that removes the guesswork. Whether you’re an entrepreneur, a small business owner, or a curious marketer looking to get started.
Why focus on visuals? Studies show that Facebook posts with images produce 2.3x more engagement than those without. That’s why this isn’t just any guide—it’s The Visual Facebook Ads Guide for Beginners, built to help you see what works, not just read about it.
At Digital Marketing Marvel, our goal is to simplify Facebook advertising so you can launch your first campaign with confidence—and results.
Read More : Meta Ads for Small Business: How to Compete with Large Brands and Succeed
Why Facebook Ads? Visual Power & Value
When it comes to online advertising, visuals speak louder than words—and Facebook knows this better than anyone. One of the top reasons we emphasize this in our Facebook Ads Guide for Beginners is because visual ads consistently outperform text-only posts.
A study by Social Media Examiner found that Facebook posts with images produce 2.3x more engagement than those without. This makes Facebook an ideal platform for brand awareness, storytelling, and emotional connection.
Facebook Ads are budget-friendly. With cost-per-click (CPC) as low as ₹1–₹3 in India, small businesses can reach highly specific audiences without breaking the bank. Whether you want to target people based on location, age, interests, or behavior, Facebook’s deep targeting capabilities are unmatched.
For instance, if you run a local bakery, you can target “cake lovers” within a 5 km radius who recently engaged with food content. That’s powerful!
To make things even smarter, Facebook’s Pixel provides real-time data—helping you track user actions, measure conversions, and optimize your ad performance.
This is exactly what we teach at Digital Marketing Marvel, and why our Facebook Ads Guide for Beginners focuses so much on using analytics to grow smart, not just fast.
Read More : What is Facebook Ads Retargeting and its Benefits for Business
Facebook Ads Ecosystem: A Visual Tour
Understanding how the Facebook Ads ecosystem works is essential for any newcomer. In this section of our Facebook Ads Guide for Beginners, let’s take a visual walk through the structure that powers your ad campaigns.
The Structure: From Meta Business Suite to Ads

Think of Facebook Ads like building a house—from blueprint to final decor. Here’s how each component fits:
- Meta Business Suite—Your command center. Manage pages, inbox, and ad performance—all in one place.
- Ads Manager—This is where the real action happens. Set up campaigns, track metrics, and test variations.
- Campaigns—The highest level where you define your objective: awareness, traffic, conversions, etc.
- Ad Sets—Targeting, budget, schedule, and placements happen here.
- Ads—This is the final creative that users actually see: your image, headline, and CTA.
Example: A clothing brand can run a conversion campaign (campaign level), target women aged 18–35 in Mumbai (ad set level), and show a carousel ad with trendy outfits and “Shop Now” (ad level).
Anatomy of a High-Performing Ad
Every Facebook ad has three crucial parts:
- Visual: Eye-catching images or videos (motion performs better—by up to 3x higher engagement!)
- Copy: Clear, relatable, and benefit-driven text.
- CTA (Call to Action): Tells the user what to do next—Shop Now, Learn More, or Sign Up.
- Format: Single image, video, carousel, slideshow, or collection—each suited for different goals.
According to Meta, video ads get 6x more engagement than static posts. So even a short 10-second clip can outperform a static image.
Don’t jump straight to ads without mapping your goals first. Use A/B testing at the ad level to see what visuals and CTAs actually work. Many beginners make the mistake of only tweaking budgets instead of testing creatives.
Read More : Click-Through Rate (CTR) in Meta Ads and How to Improve it
Setting Up Your Meta Ad Account

Digital Marketing Marvel presents this essential setup from the Facebook Ads Guide for Beginners.
Before running any ad, you need the right foundation. Here’s how to set up your Meta Ad Account step by step:
Step 1: Create a Meta Business Suite Account
Go to business.facebook.com and click on “Create Account.” Use your business name and email. This is your command center for all your ads, pages, and assets.
Fact: Over 200 million businesses use Meta tools monthly to connect with customers—this first step puts you among them.
Step 2: Connect (or Create) Your Facebook Page
If you already have a Facebook Page, simply link it to your Business Suite. If not, you can create one in a few clicks. Your ads can’t run without a page—this is how your brand appears in the feed.
Step 3: Set Up Ads Manager & Ad Account
Inside Business Suite, navigate to Ads Manager and set up your ad account:
- Choose your time zone and currency (non-editable later)
- Assign roles—Admin, Analyst, etc.
Ads Manager is the heart of your campaign journey, which we’ll explore later in this Facebook Ads Guide for Beginners.
Step 4: Install the Facebook Pixel on Your Website
This part gets a bit technical—but it’s worth it.
The Meta Pixel is a tracking code you add to your website. It tells you what users do after clicking your ad—like purchases or sign-ups. More importantly, it helps with retargeting and optimizing your ad spend.
Stat: Businesses using the Facebook Pixel see up to 20% better ad performance through improved targeting.
You can install it manually or via tools like WordPress, Shopify, or Google Tag Manager. Our visual walkthrough (insert screenshots here) will guide you step-by-step.
This setup may feel like a lot, but it’s the backbone of your ad success. The Facebook Ads Guide for Beginners is here to ensure you don’t skip a beat.
Campaign Creation: Visual Guide for Beginners

Now that your Meta Ad Account is ready, it’s time to build your first campaign. This section of the Facebook Ads Guide for Beginners walks you through key choices that shape your ad’s performance.
Choosing Your Campaign Objective
Meta offers multiple objectives depending on your goal:
- Awareness—Build brand recognition
- Traffic—Drive visitors to your site or landing page
- Engagement—Boost likes, shares, and comments
- Leads—Generate inquiries via instant forms
- Sales—Drive conversions through website actions
Advertisers using clear, goal-aligned objectives see up to 33% higher ROI compared to those who don’t.
Read More : A/B Testing Meta Ads: How to Optimize Your Campaigns
Building Ad Sets with Visual Examples
Once your campaign objective is set, it’s time to build the ad set—where the real targeting magic happens. Here’s a clear walkthrough to help you decide who, where, and how much to show your ads.
Budget & Schedule: Daily vs. Lifetime
Meta gives you two options:
- Daily Budget—Sets a fixed amount to spend each day. Best for steady results.
- Lifetime Budget—You define a total spend and date range. Facebook auto-optimizes spend across days.
Recommendation: For those following the Facebook Ads Guide for Beginners, start with a daily budget of ₹200–₹500. This gives you control while learning how your ad performs.
Audience Targeting: The Real Power of Meta Ads
This is where Facebook shines—its micro-targeting capabilities. You can choose:
- Demographics: Age, gender, location, language
- Interests: Hobbies, behaviors (like online shopping, fitness, travel)
- Custom Audiences: People who have interacted with your page or website
- Lookalike Audiences: New people similar to your best customers
Running a yoga class? Target 25–40-year-old women in your city interested in wellness and fitness.
Placements: Where Your Ads Appear
Facebook lets you choose where your ad is shown:
- Feeds (Facebook & Instagram)—Most common and stories—great for full-screen visuals
- Reels—perfect for short video ads
- Messenger, In-stream, Search, etc.—Optional, based on format
For beginners, the Facebook Ads Guide for Beginners recommends selecting Automatic Placements. This allows Meta to optimize delivery across all platforms and devices.
Automatic placements typically reduce cost per result by up to 30%, especially for new advertisers.
Read More : Meta Ads Key Metrics to Track for Successful Campaigns
Crafting the Perfect Ad (Visual-First)
Your ad is what people actually see—so it needs to stop the scroll and spark interest within seconds. Here’s how to get it right:
Format Options
Meta offers a variety of engaging ad formats:
- Single Image—Clean and simple
- Video—ideal for storytelling or demos
- Carousel—Multiple images/videos users can swipe through
- Collection—Great for showcasing products in a full-screen shopping experience
Example: A clothing brand might use carousel ads to display outfits for different seasons, increasing click-throughs by 20–30%.
Visual Best Practices
Your creatives should be
- Mobile-optimized (vertical ratio 4:5 or 9:16)
- Authentic—real photos or user-generated content outperform polished stock images
- Video tip: Test videos shot on mobile—they often appear more native and relatable to users
Stat: Mobile-first ads designed vertically deliver up to 3x better performance on Stories and Reels.
Copywriting 101
Pair great visuals with compelling copy.
- Headline—Clear, benefit-driven (e.g., “Get Fluent in 30 Days”)
- Primary Text—Address a pain point or offer a solution
- Call-to-Action (CTA)—Use Meta’s preset CTAs like “Learn More,” “Shop Now,” etc.
Technical Specs & Design
- Recommended resolution: 1080×1080 px (square) or 1080×1920 px (vertical)
- Text should not cover more than 20% of the visual
- File size limit: 4GB for video, 30MB for image
Read More : The Secret to High-Performing Meta Ads Creatives
Launch & Publish (What to Expect)
This part of the Facebook Ads Guide for Beginners explains what happens once your ad is built.
Review Process
Once submitted, Meta reviews your ad content:
- Typically completed in under 24 hours
- Ads must comply with Facebook’s ad policies (no misleading claims, adult content, etc.)
If rejected, you’ll be notified and given a chance to edit and resubmit.
Visual Checklist Before You Publish
- Clear campaign objective selected
- Audience targeting aligned
- Proper format & placements set
- Creative fits technical specs
- Strong CTA and mobile preview checked
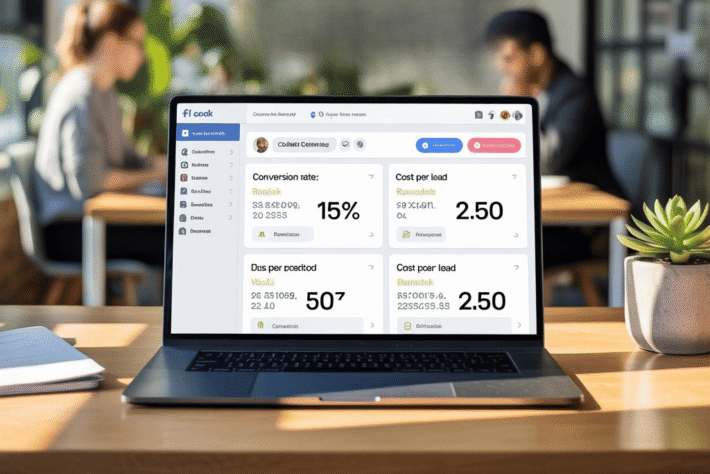
Tracking, Testing & Optimizing Performance

Once your ad is live, the work isn’t done. In this phase of the Facebook Ads Guide for Beginners, we teach you how to read results and improve them.
Key Metrics to Monitor
- CPC (Cost Per Click)—Is it within budget?
- CTR (Click-Through Rate)—Are people engaging with your ad?
- Conversions—Are your desired actions being completed
Benchmarks: A healthy CTR is around 1-2%, and a good CPC in India ranges from ₹2 to ₹10 depending on the niche.
A/B Testing (Split Testing)
Try testing:
- Two different visuals
- A new headline or CTA
- Alternate audiences (e.g., lookalike vs. interest-based)
Facebook’s Advantage+ Creative can also help optimize combinations automatically.
Troubleshooting Underperforming Ads
If results are poor, revisit:
- Targeting—Are you reaching the right audience?
- Creative—Is your visual eye-catching enough?
- Offer—Does the value come across clearly?
Even seasoned advertisers refresh their creatives every 7–14 days to keep performance strong.
From creation to launch and beyond, mastering ads takes time. But with the help of this Facebook Ads Guide for Beginners, you’re well-equipped to build, test, and grow successfully.
Advanced Visual Strategies
Once you’ve run a few ads, it’s time to level up your visual strategy. These advanced tactics help you scale smarter and connect deeper with your audience.
Dynamic Creative Testing
Meta allows dynamic creative setups where you upload multiple
- Headlines
- Primary texts
- Images/videos
- CTAs
Facebook automatically tests all combinations and serves the best-performing version.
Stat: Dynamic creative testing can increase conversions by up to 34% by delivering more personalized ad versions.
Remarketing with Visuals & UGC
Remarketing helps you reconnect with people who:
- Visited your website
- Watched your videos
- Engaged with your page or ads
Use user-generated content (UGC) like real customer testimonials, unboxings, or review clips. They build trust and authenticity.
Example: A brand saw 40% higher CTR when they used real customer photos vs. studio images in remarketing ads.
Leveraging Lookalike Audiences
Lookalike audiences are built from your best customers. Facebook finds similar users who are more likely to convert.
Pair this with tested visuals and messaging for efficient scaling.
Pro Tip for readers of the Facebook Ads Guide for Beginners: Start with a 1% lookalike for high relevance, then expand to 2–3% for broader reach.
Top Visual Design Tips (Quick List)

Short on time? Here’s your cheat sheet for designing scroll-stopping visuals.
✅ Use one strong image with clear focus.
✅ Try contrasting colors to grab attention.
✅ Design mobile-first—vertical, minimal clutter
✅ Avoid faces unless necessary—let the product or idea shine.
✅ Add social proof—reviews, ratings, testimonials—on the image
Visuals with embedded testimonials or social proof improve conversion by up to 38%.
Following these basics from the Facebook Ads Guide for Beginners can dramatically improve results—even with a low budget.
Conclusion
You’ve made it through the complete Facebook Ads Guide for Beginners—with a strong emphasis on visuals, strategy, and simplicity.
Let’s recap your key “visual-first” steps:
- Set clear objectives
- Use tested ad formats
- Target precisely and test creative elements
- Start simple—a single image ad with clear copy can work wonders
- Track performance and adjust regularly
Now it’s your turn. Launch your first visual ad, even if it’s small. Experience is the best teacher.
Need feedback, ideas, or help troubleshooting?
Digital Marketing Marvel is here to support your journey.